Fig. 1 — Full build walkthrough. Prefer reading? Every step is below with wiring diagrams and code.
Planning to compete at the OLL × TechFest Robotics Championship and unsure where to start? This guide packs the entire build — mechanical design, electronics, ESP32 firmware and testing — into a single reference you can follow even if this is your first robotics project. It’s written by Pratyoosh, a RoboSumo winner from NL Dalmia High School and refined against the current championship ruleset.
In this guide
- What is OLL × TechFest?
- What is a RoboSumo Robot?
- Components You’ll Need
- Get the Official Kit
- Step 1 · Build the Chassis
- Step 2 · Design the Wedge
- Step 3 · Choose the Battery
- Step 4 · Install the Motors
- Step 5 · Wire the BTS7960
- Step 6 · Motor-Driver Bracket
- Step 7-10 · Power & Wiring
- Step 11-12 · Connect the ESP32
- Step 13 · ESP32 Code Walkthrough
- Step 14 · Final Testing
- Step 15 · Weigh Your Bot
- FAQ
Championship
What is OLL × TechFest IIT Bombay?
OLL × TechFest 2026-27 is a national robotics championship for school students in Grades 4–12. It gives young makers a stage to build, compete and innovate — and its Grand Finale is held at IIT Bombay from 16–18 December 2026.
The championship runs three parallel tracks:
- RoboSumo — 1 v 1 robot battle (this guide).
- RoboRacer — high-speed autonomous / manual robot racing.
- Robotics Innovation Challenge — build an original robotic or automated solution to a real-world problem.
Participation is FREE, with a ₹1.5 lakh prize pool and qualification rounds you can join from anywhere in India:
National Online Qualifier → Regional Qualifier → Grand Finale @ IIT Bombay
Concept
What is a RoboSumo Robot?
RoboSumo is a robot-versus-robot pushing contest — your bot must shove its opponent out of a circular arena. Sounds simple, but a winning RoboSumo demands the right balance of torque, traction, weight, ground clearance, wedge geometry and control. Raw motor power alone loses matches. Winning bots blend mechanical design, electronics and firmware.
- Motor torque & RPM
- Wheel traction & ground clearance
- Chassis weight distribution
- Wedge angle (getting under the opponent)
- Power delivery & PWM control
- Overall stability under impact
Bill of materials
Components You’ll Need
Every part in this build is available off-the-shelf in India, or bundled together in the official RoboSumo kit (see below).
| Component | Purpose |
|---|---|
| Robot chassis (wood / acrylic) | Main body of the robot |
| Stainless-steel wedge | Slides under the opponent |
| 3S LiPo battery (11.1 V) | Main power source |
| LiPo battery charger | Safe charging |
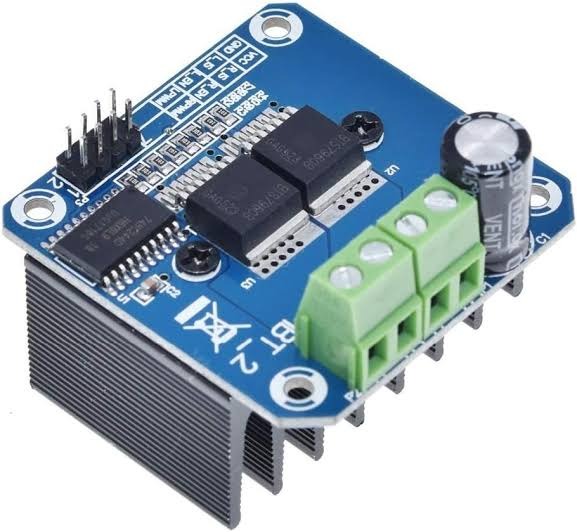
| BTS7960 motor drivers ×2 | 43 A H-bridge motor control |
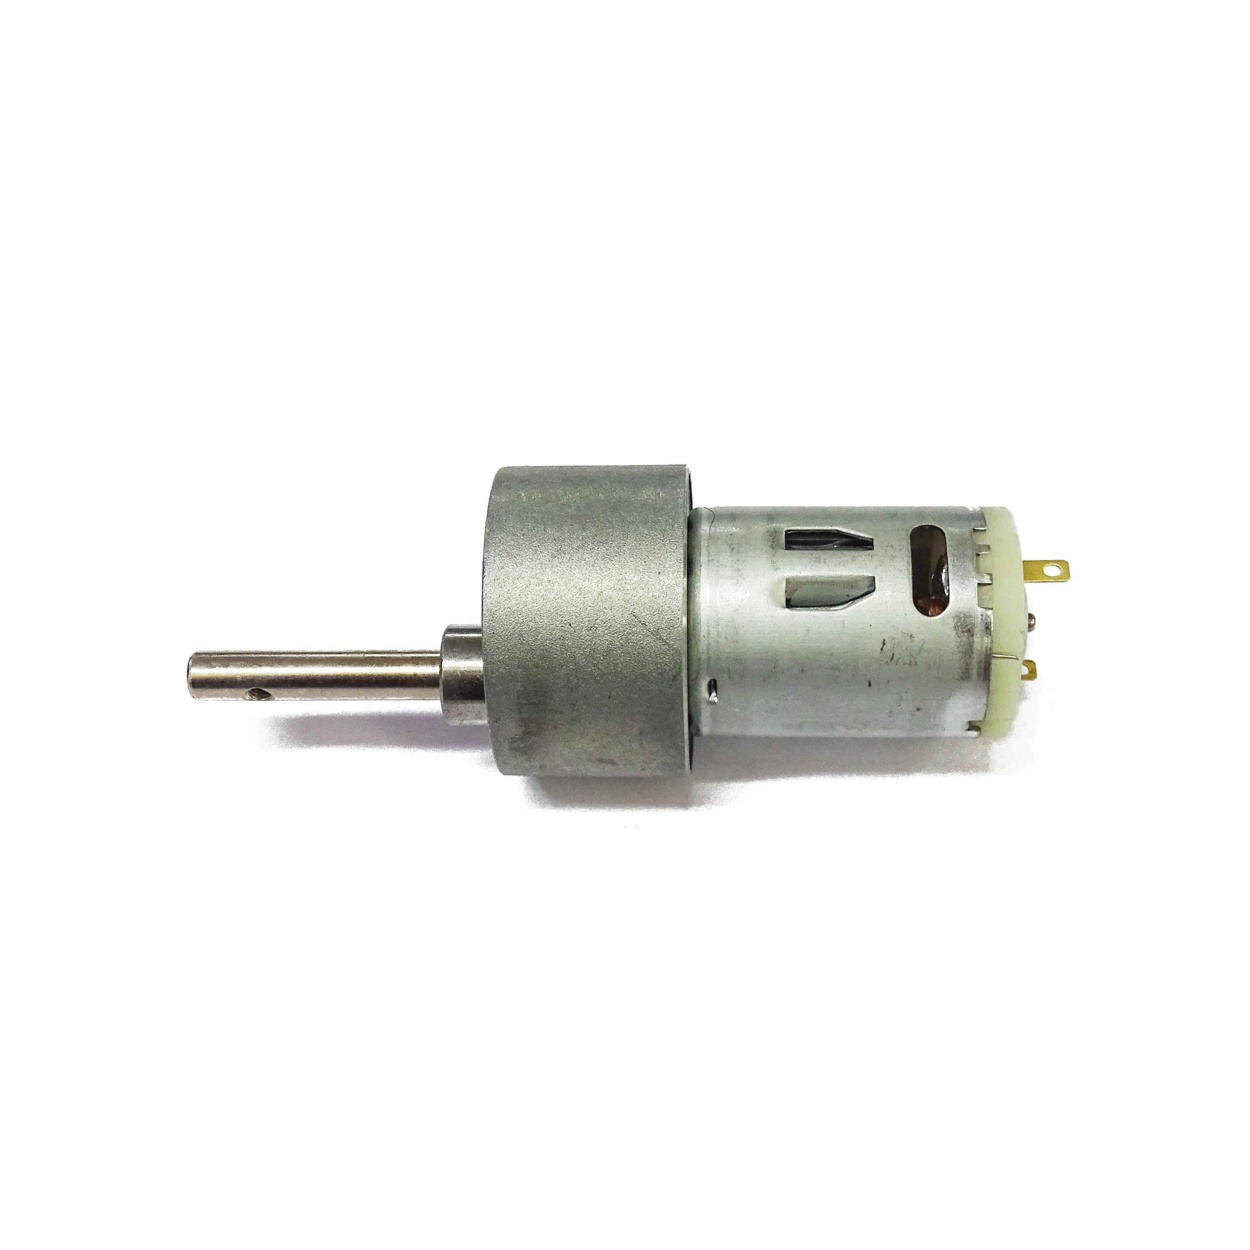
| 300 RPM Johnson motors ×2 | High-torque drive |
| ESP32-S3 / ESP32-C3 | Main control unit |
| Rubber wheels | Traction on the arena floor |
| XT60 connectors | Battery power delivery |
| LM2596 DC-DC step-down | 12 V → 5 V regulation for ESP32 |
| 100 µF / 0.1 µF capacitors | Voltage smoothing |
| U-clamps + shaft enclosures | Motor mounting |
| Soldering iron, multimeter, screwdrivers | Assembly tools |
| Heat-shrink tubing, jumper wires | Insulation & wiring |
Save time
Get the Official RoboSumo Competition Kit
Sourcing 15+ compatible components can eat weeks. The OLL × TechFest RoboSumo Kit ships every essential — motor drivers, ESP32, LiPo, wheels, XT60s, LM2596 — pre-selected for the current ruleset so you can spend your time building, not shopping.
Official Competition Kit
RoboSumo Kit — Specially for TechFest IIT Bombay
Everything you need to start your build. Ships across India. Refined by past championship winners.
Purchase the Kit- ESP32-S3 development board
- 2 × BTS7960 43 A motor drivers
- 2 × 300 RPM Johnson motors
- 3S 2200 mAh LiPo + charger
- LM2596 DC-DC buck module
- Rubber wheels + XT60 + wiring
Prefer to source parts individually? All build resources — STL files, motor-driver bracket CAD and the full ESP32 code — are in the RoboSumo Resources folder .
Step 1
Build the Robot Chassis
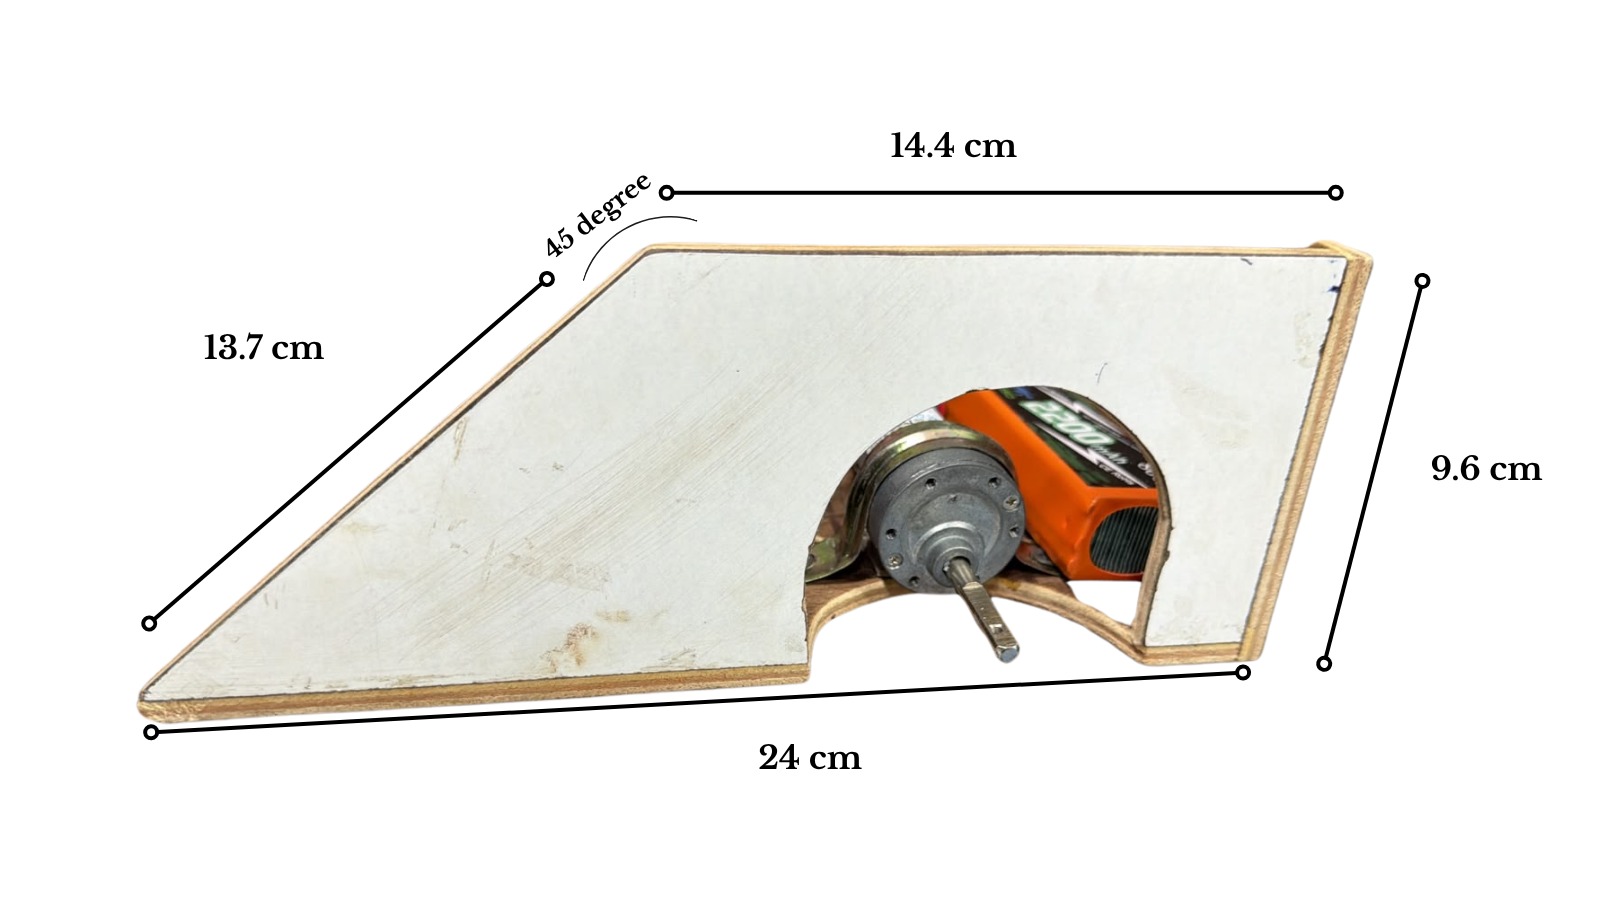
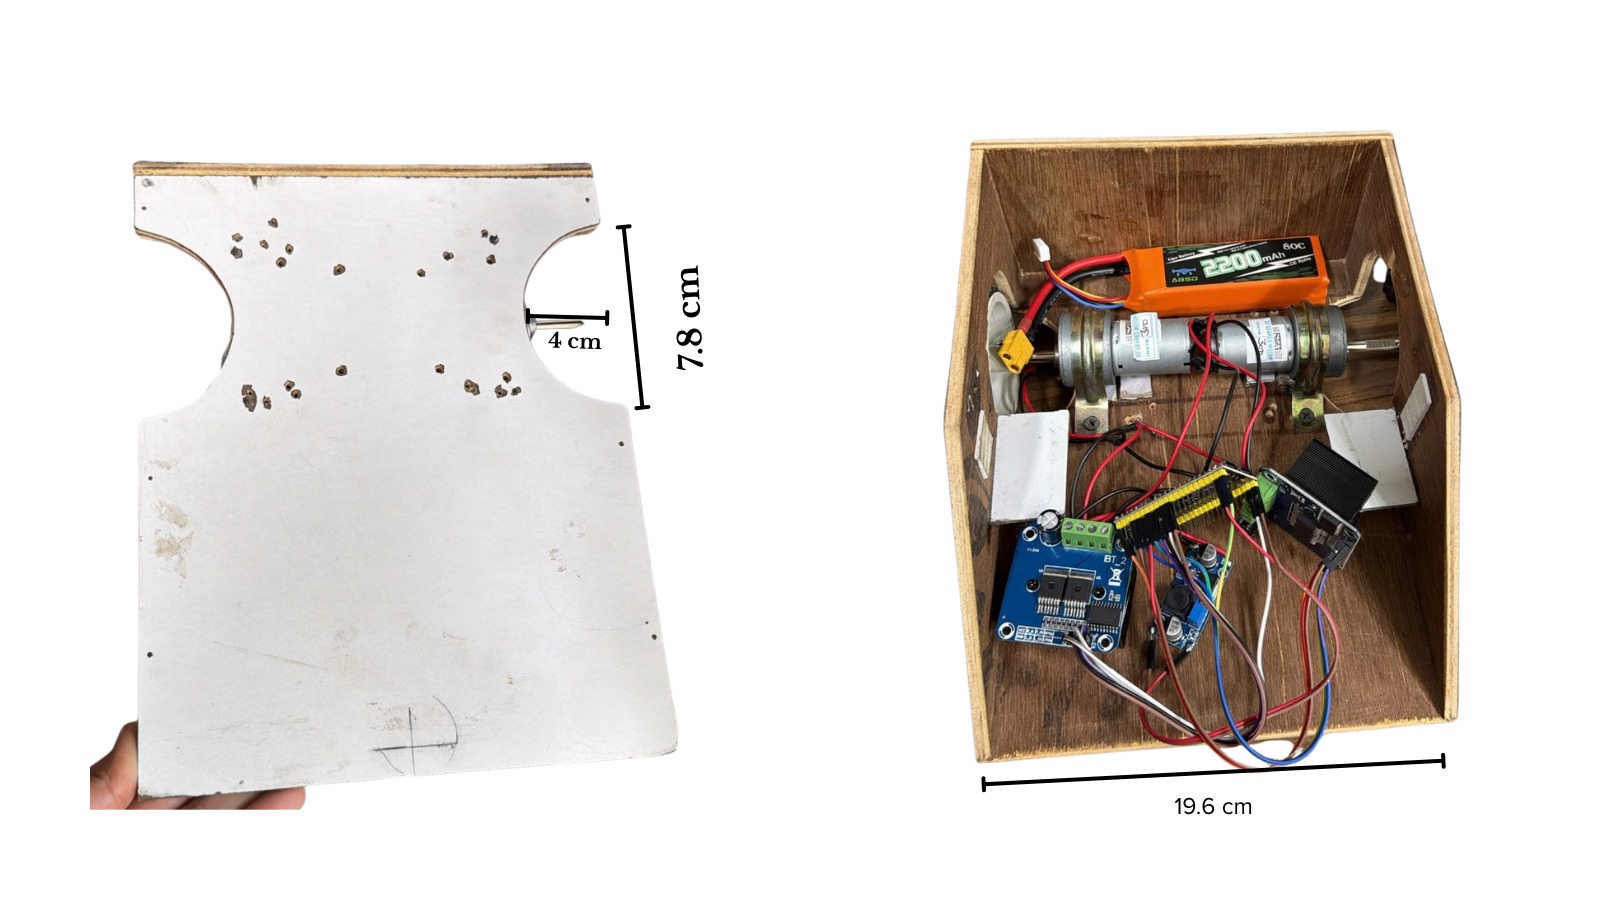
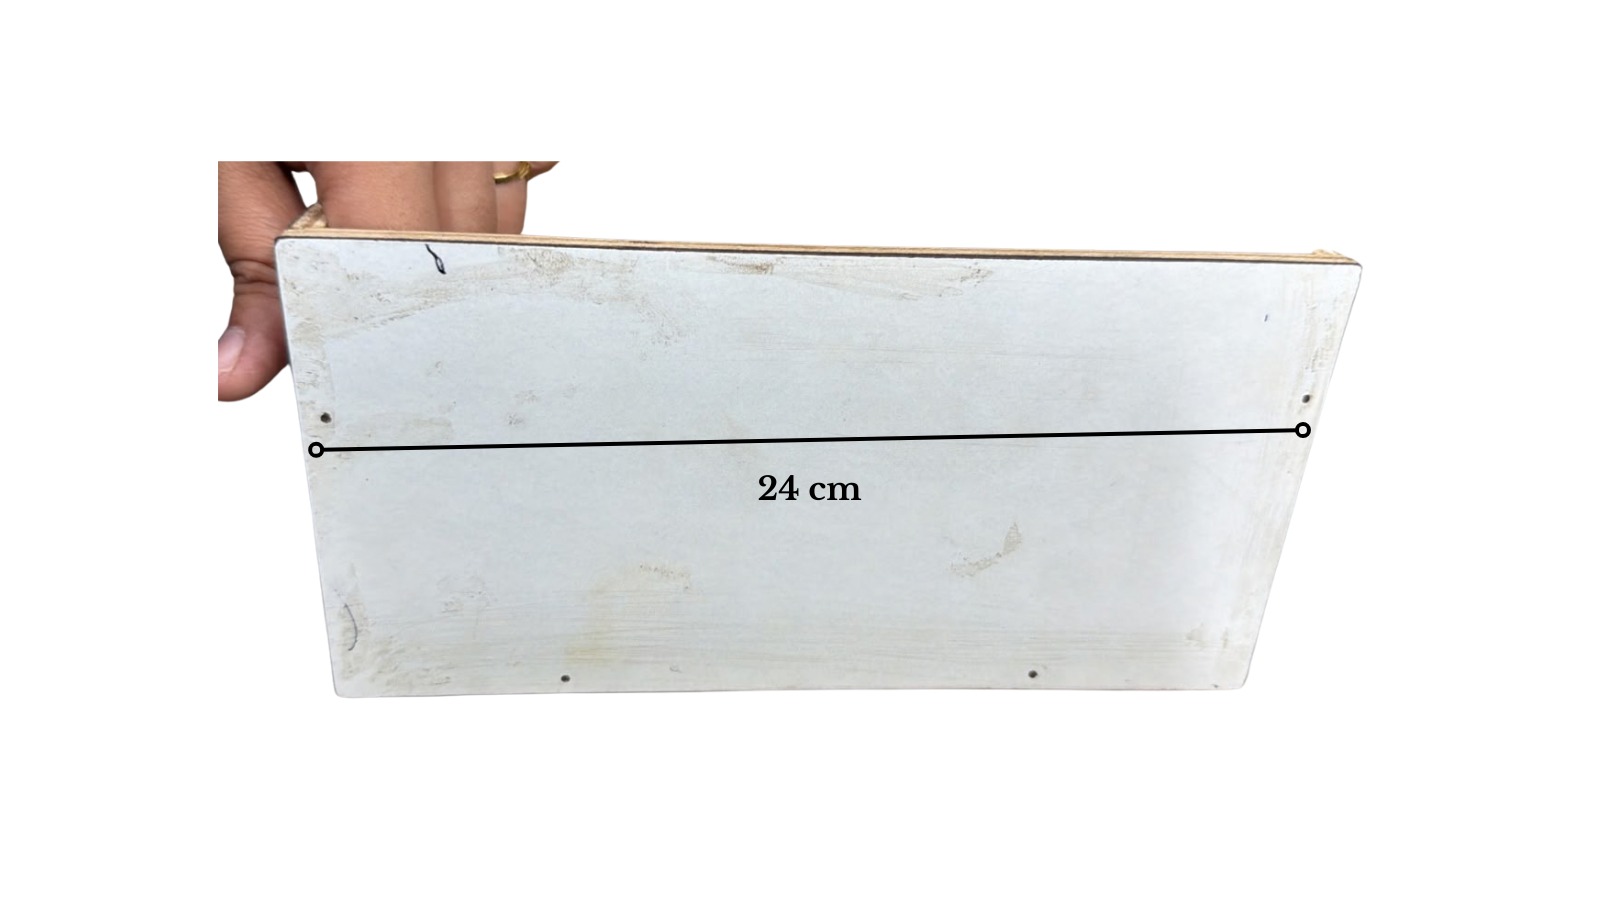
The chassis is the mechanical backbone. In this reference build it’s made from plywood (light, cheap, easy to cut) with the stainless-steel wedge bolted to the front. Two circular cutouts host the wheels; the sloped front lets the bot slide under the opponent.
Approximate dimensions used here:
- Length: 24 cm
- Width: 19.6 cm
- Height: 9.6 cm
- Wheel opening radius: ~5 cm
- Front slope: ~45°
Step 2
Design the RoboSumo Wedge
The wedge is arguably the single most important mechanical part. Angled at roughly 25° (measured 15.7° effective in this build) and cut from stainless steel, it lets the robot get beneath the opponent — killing their traction and letting yours do the pushing.
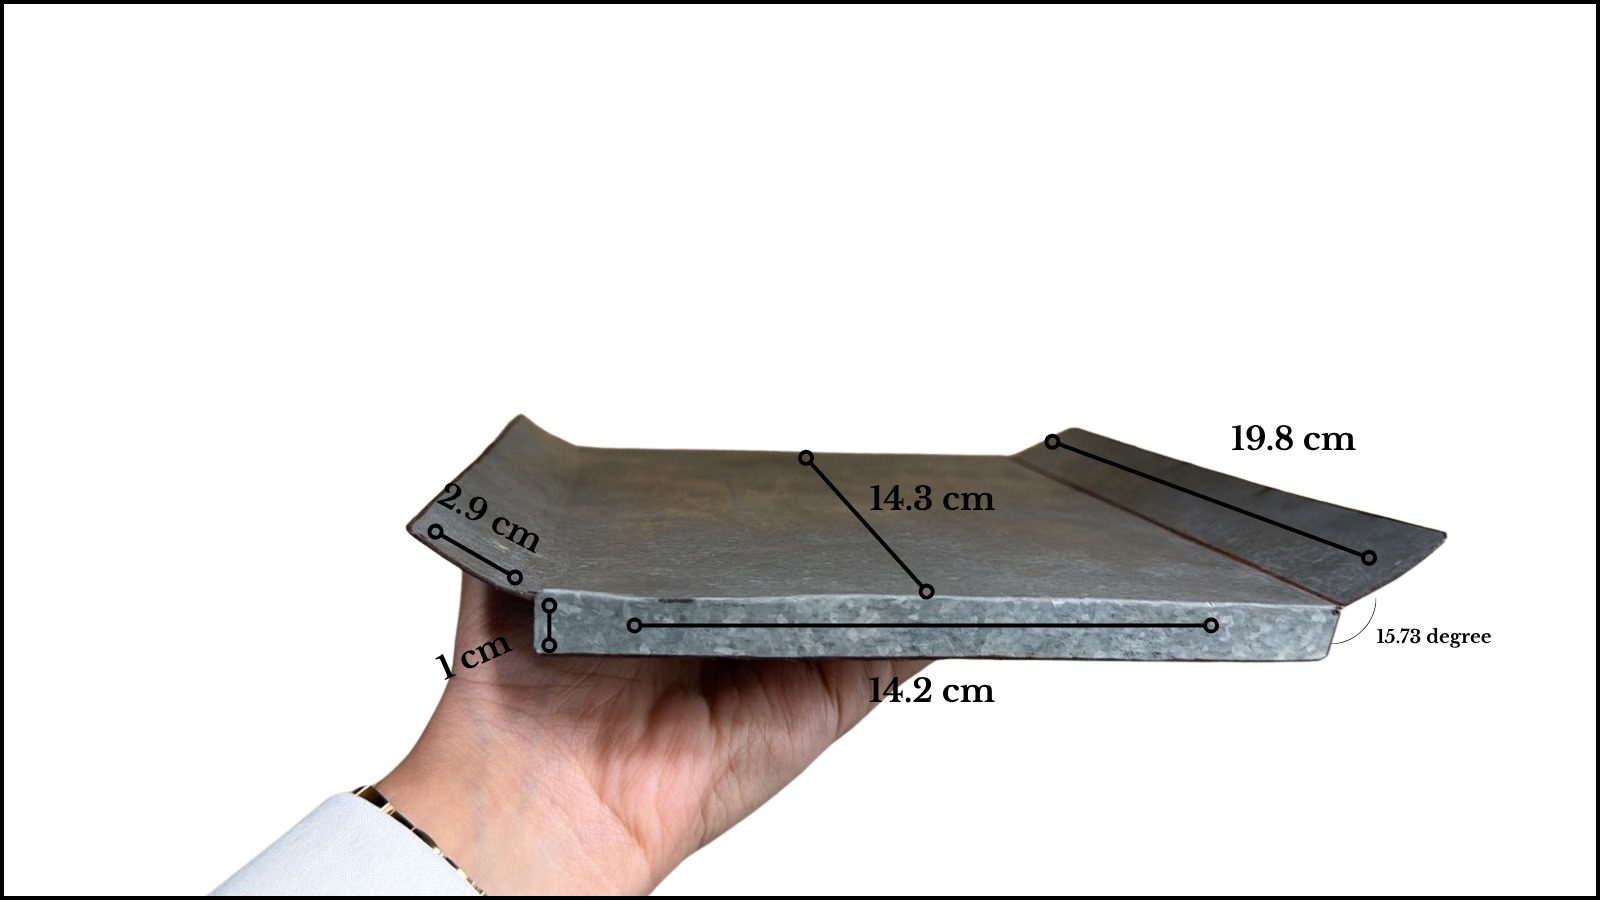
Ensure your final wedge complies with the official rules on edges, dimensions and materials. A wedge that’s too sharp or overhangs beyond limits can disqualify an otherwise legal bot.
Step 3
Choose the Battery
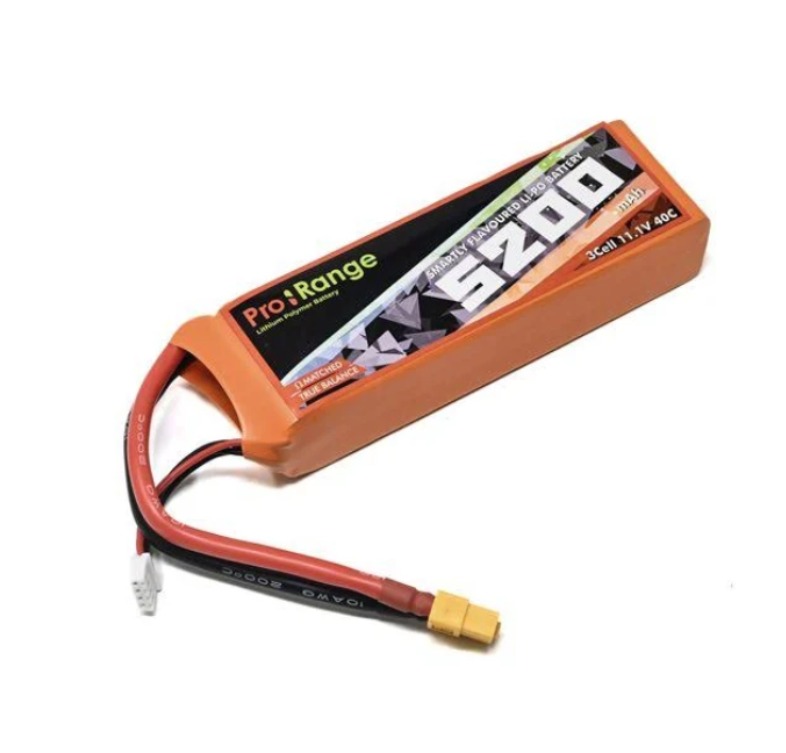
RoboSumo motors pull massive current in short bursts. A 3S LiPo (11.1 V) is the classic choice — high discharge C-rating, generous capacity for a short match and small enough to fit inside a 3 kg bot.
Step 4
Install the 300 RPM Johnson Motors
Two 300 RPM Johnson gear motors drive the two rubber wheels. 300 RPM is the sweet spot between torque and speed for a 3 kg sumo. Mount each motor with U-clamps into the chassis cutouts.
Step 5
Wire the BTS7960 Motor Drivers
Each Johnson motor is driven by a BTS7960 43 A H-bridge module. One driver per motor gives you full independent PWM control, which is what differential-drive steering needs.
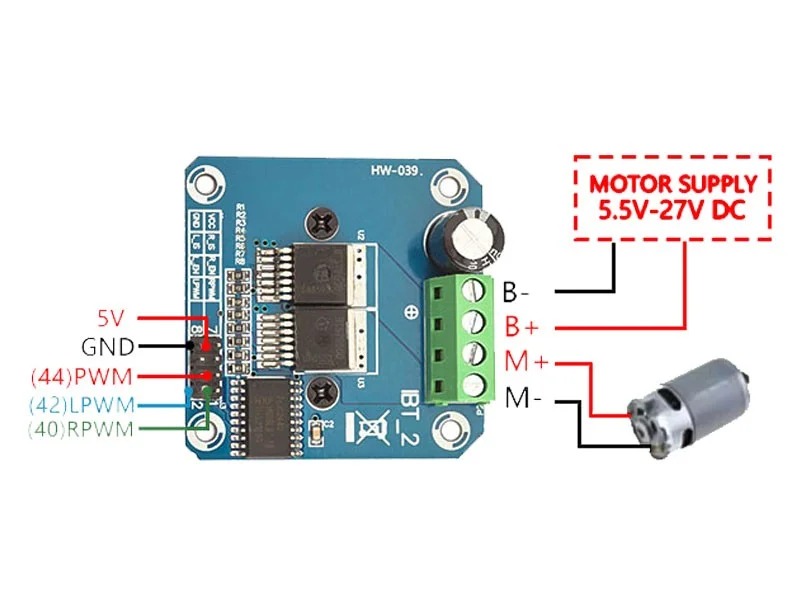
Motor terminal convention used throughout this build:
- Black wire → M-
- Red wire → M+
Step 6
Design a Motor-Driver Bracket
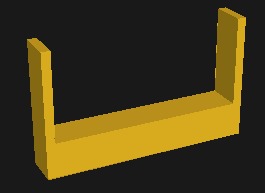
A pair of small 3D-printed brackets (designed in Autodesk Fusion) holds each BTS7960 securely to the chassis. Using two narrow clamps rather than one wide one keeps the driver’s screw terminals accessible after mounting.
Steps 7-10
Power Delivery & Wiring
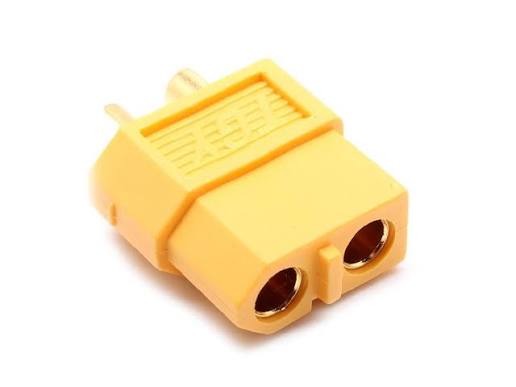
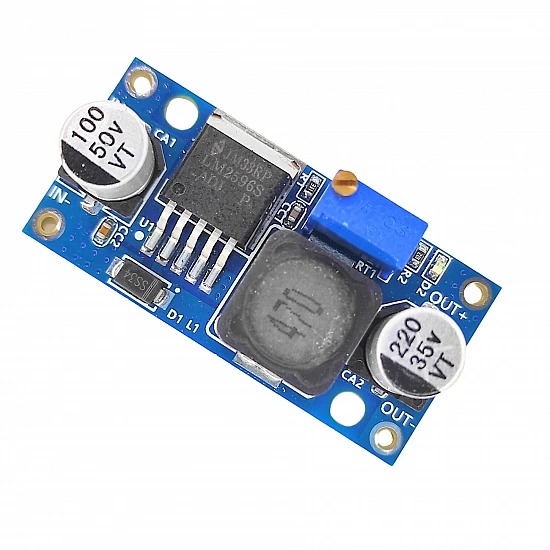
With the mechanical build done, we can move to power. Steps 7-10 all belong to the same subsystem — the goal is to feed 11.1 V from the LiPo to both BTS7960s directly, and a clean 5 V rail to the ESP32 through an LM2596.
- Solder the motor wires onto each motor and into the corresponding
M+/M-terminal on the BTS7960. - Add the XT60 pigtail to the LiPo lead — this becomes the master power connector for the whole robot. Confirm polarity twice.
- Split the battery feed into two branches: one to the BTS7960
B+/B-pair, the other into the LM2596 input. - Set the LM2596 to 5.0 V using a multimeter before connecting the ESP32. A 100 µF electrolytic cap across the output (with an optional 0.1 µF ceramic in parallel) will crush the ripple.
Steps 11-12
Connect the BTS7960 to the ESP32
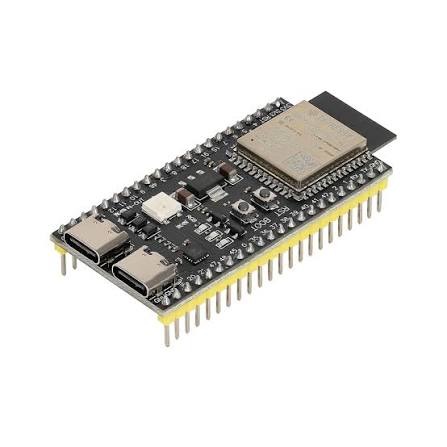
The BTS7960 exposes six logic pins: RPWM, LPWM, R_EN, L_EN, VCC, GND. Wire them to the following ESP32 GPIOs — this mapping matches the firmware in the next section:
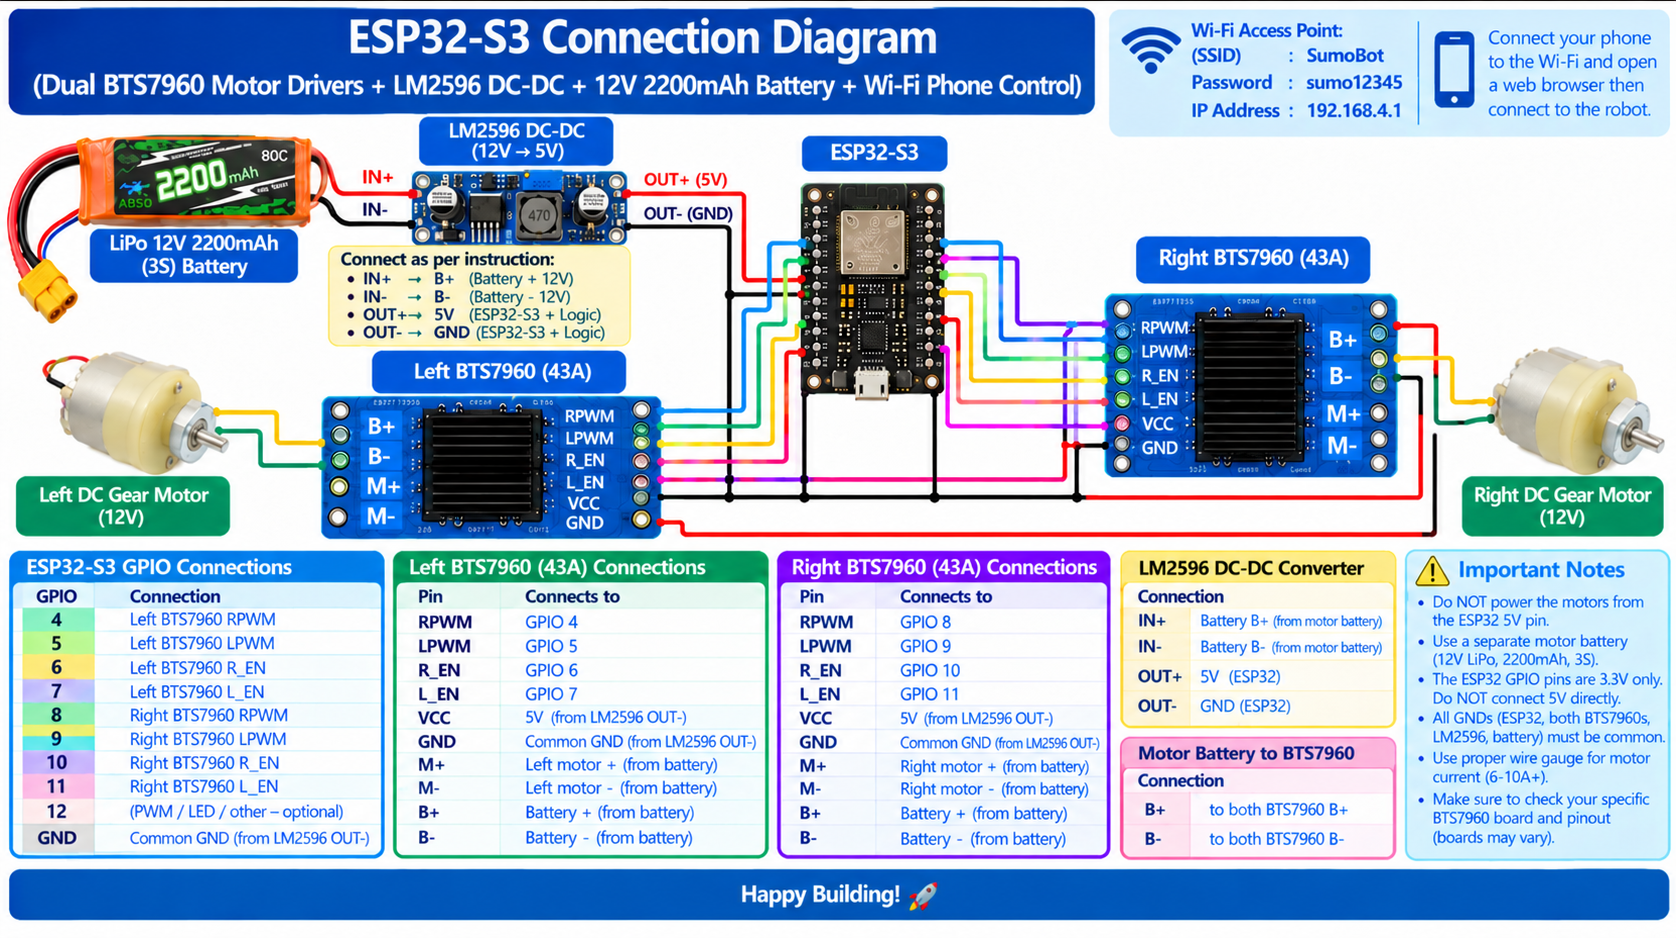
// LEFT BTS7960
#define L_RPWM 4
#define L_LPWM 5
#define L_R_EN 6
#define L_L_EN 7

// RIGHT BTS7960
#define R_RPWM 15
#define R_LPWM 16
#define R_R_EN 17
#define R_L_EN 18

// FlySky FS-CT6B receiver (optional RC control)
#define RC_CH1 8   // Steering
#define RC_CH2 9   // Throttle
Use short jumper wires while prototyping so you can rewire fast during testing. Solder them once you’re confident the mapping is stable.
Step 13
ESP32 Firmware Walkthrough
A single Arduino sketch handles everything: motor PWM, the Wi-Fi joystick web-app, optional FlySky RC input and a hard failsafe that stops the motors if either controller drops.
1. Wi-Fi access-point setup
The ESP32 hosts its own Wi-Fi so no router is needed at the venue. Connect any phone to the SSID SumoBot and open 192.168.4.1.
#include <WiFi.h>
#include <WebServer.h>

const char* AP_SSID     = "SumoBot";
const char* AP_PASSWORD = "sumo12345";

const int RC_FAILSAFE_MS   = 300;   // stop motors if no RC pulse in 300ms
const int WIFI_FAILSAFE_MS = 500;   // stop motors if no phone cmd in 500ms
const int PWM_FREQ         = 20000; // 20 kHz — inaudible to humans
const int PWM_RES_BITS     = 8;     // 0..255
const int MOTOR_MAX        = 255;
2. Differential-drive mixing
Throttle drives both wheels forward/back; steering biases the left/right speed to make the bot turn. Constrain to keep PWM inside legal bounds.
int left  = throttle + steering;
int right = throttle - steering;

left  = constrain(left,  -MOTOR_MAX, MOTOR_MAX);
right = constrain(right, -MOTOR_MAX, MOTOR_MAX);

driveMotor(L_RPWM, L_LPWM, left);
driveMotor(R_RPWM, R_LPWM, right);
3. Phone joystick endpoint
The on-board web page (also served by the ESP32) sends joystick values over a single HTTP endpoint. Format: /cmd?t=<throttle>&s=<steering>.
server.on("/cmd", HTTP_GET, []() {
  lastPhoneMs = millis();                 // reset failsafe timer
  phoneThrottle = server.arg("t").toInt();
  phoneSteering = server.arg("s").toInt();
  server.send(200, "text/plain", "OK");
});
4. Failsafe priority
RC control always wins if it’s live — the moment the sticks move off centre by more than the deadband, phone commands are ignored. If both inputs go silent, the motors are cut hard.
bool rcLive    = (millis() - lastRcMs)    < RC_FAILSAFE_MS;
bool phoneLive = (millis() - lastPhoneMs) < WIFI_FAILSAFE_MS;

if (rcLive) {
  applyMix(rcThrottle, rcSteering);
} else if (phoneLive) {
  applyMix(phoneThrottle, phoneSteering);
} else {
  stopMotors();     // final safety state
}Step 14
Final Testing Checklist
Before the first powered test, walk this list top-to-bottom:
- All solder joints solid and heat-shrunk.
- Battery polarity confirmed with a multimeter.
- LM2596 measured at 5.0 V — no more, no less.
- No stray strands bridging BTS7960 terminals.
- Wheels mount square; nothing rubs.
- Common ground between LiPo, LM2596, ESP32 and both BTS7960s.
Now power up and test each motion in isolation — forward, reverse, left, right, stop. Both motors should spin in the direction you expect at each throttle/steering input.
Step 15
Weigh Your RoboSumo
Finally — put the bot on a kitchen scale. The target for this reference build is ≤ 3 kg. Always confirm against the current rulebook — a bot over-weight by 20 g on match day is a lost season.
Ready to compete?
Take your RoboSumo to IIT Bombay.
OLL × TechFest 2026-27 is FREE to enter, open to Grades 4–12 across India, and offers a ₹1.5 lakh prize pool with the Grand Finale at IIT Bombay in December.
FAQ
RoboSumo Build FAQs
What is the weight limit for a RoboSumo robot at OLL × TechFest?
For this reference build the target is under 3 kg. Always confirm against the latest official OLL × TechFest RoboSumo rulebook — weight, dimensions and construction rules can change per season.
Which ESP32 board is best for a sumo bot?
An ESP32-S3 or ESP32-C3 is ideal — both include hardware Wi-Fi, support 20 kHz PWM out-of-the-box and have enough GPIOs to drive two BTS7960 modules plus an FS-CT6B RC receiver. GPIO pins are 3.3 V, never feed them 5 V directly.
Do I need a 3D printer to build a RoboSumo?
No. The 3D-printed motor-driver bracket is optional — you can mount the BTS7960 modules with strong double-sided VHB tape or a small aluminium/acrylic plate. The chassis in this guide is made from wood.
How do I control the RoboSumo from my phone?
The ESP32 hosts its own Wi-Fi access point (SSID: SumoBot, password: sumo12345). Connect any phone or laptop, open 192.168.4.1 in the browser and use the on-screen joystick — no app installation needed.
Where can I buy the official RoboSumo kit?
The official OLL × TechFest RoboSumo Competition Kit ships across India with all essentials pre-selected for the current ruleset. Get it from the OLL shop.
Written by
Pratyoosh
RoboSumo winner from NL Dalmia High School and past participant of the OLL × TechFest Robotics Championship. He writes about ESP32, mechatronics and school-level robotics competitions.